Body
Set up your ETAMU Pro Zoom Account
ETAMU University accounts are now available under a 3-year site-license agreement for Faculty and Staff.
A Zoom account has been created for all employees of the university.
If do not have a zoom account please follow the link below and use this guide to set up your account. We recommend using Chrome.
If you experience any problems please call the help desk at 903.468.6000.
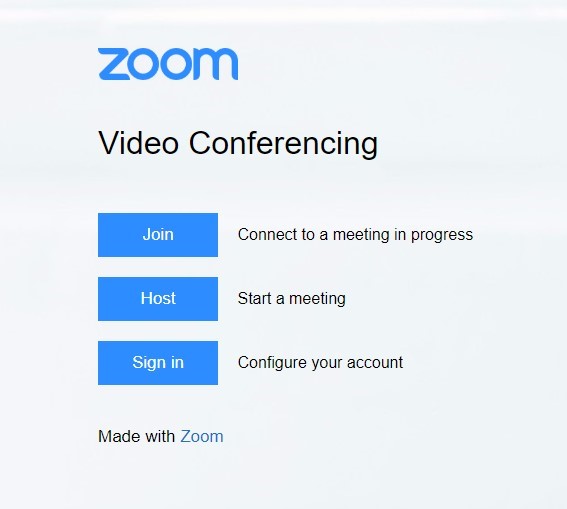
Step 1: Follow the zoom link https://tamuc.zoom.us
It will take you to the Zoom page shown below.
Note: If you do not see this page, you must clear your browser cache.
Step 2: Click “Sign In” and use your SSO credentials <LastNameFirstname> to log in.

Step 3: You will be prompted to perform a DUO two-factor authentication.
If this is your first-time using Zoom you will then be taken to your Zoom preferences page. Skip to step 9 and verify the information that is presented. If not, continue to Step 4.
Step 4: Select Switch to New Account to authenticate your Zoom account.
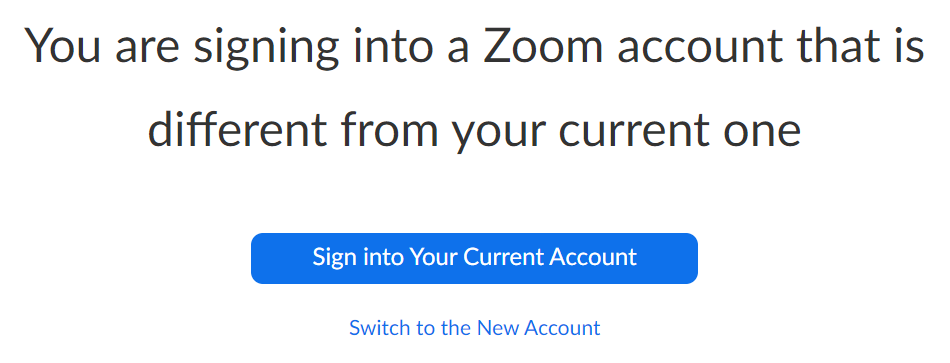
Step 5: If prompted, acknowledge and switch to the new account.
Step 6: You will get an email to your ETAMU mailbox. Click the “Switch to the new account” button in the email.
Step 7: You may get an Accept button to confirm the switch. Click the Accept button.
Step 8: Click the "I acknowledge the switch" button
To Connect your calendar.

Select “Connect to Calendar and Contact Service”.

Select “Exchange”.
You will want to allow Zoom to get calendar events and sync contacts.
Fill in the fields below with your information.

Select “Exchange 2016”
Enter https://outlook.tamuc.edu/EWS/Exchange.asmx for the EWS URL
For other questions or help you can also use this link for the Zoom Help Center:
https://support.zoom.us/hc/en-us/sections/201728913-Joining-Starting